Uploading Custom Vector Data
GeoRetina AI allows you to upload your own geospatial data and query it using natural language, just like you would with public data sources. This feature enables you to bring your proprietary data into GeoRetina AI and interact with it seamlessly.
Supported Data Formats
You can upload vector data in several common formats:
| Format | File Extension | Notes |
|---|---|---|
| GeoJSON | .geojson, .json | Preferred format for web applications |
| Shapefile | .zip (containing .shp, .dbf, .shx, etc.) | Must be uploaded as a ZIP archive with all component files |
| KML/KMZ | .kml, .kmz | Common format from Google Earth applications |
Uploading Your Data
1. Access the Data Upload Options
When chatting with GeoRetina AI, you have several ways to upload geospatial data:
2. Select and Upload Your File
- Click the upload button or drag and drop your file
- Select the geospatial data file from your computer
- Wait for the upload to complete
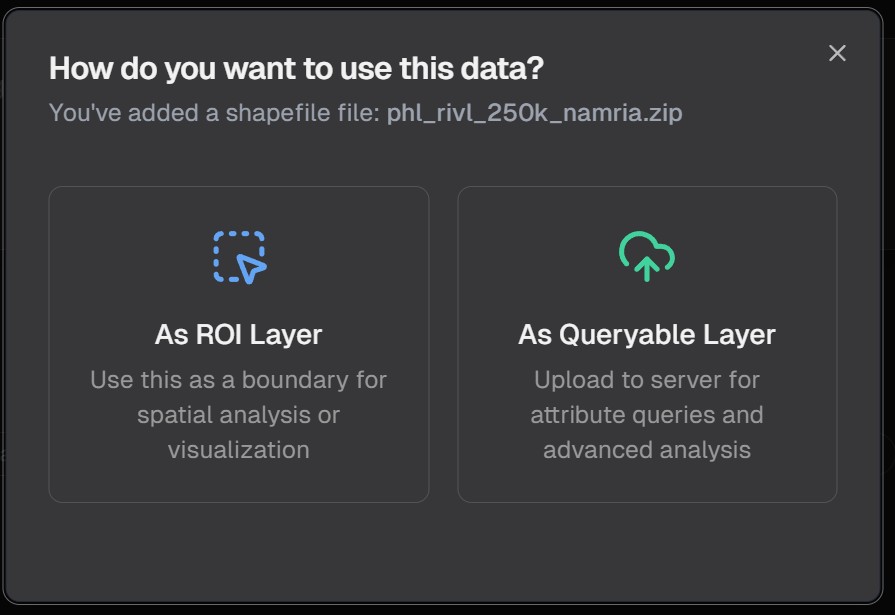
Once processing is complete, you'll see a confirmation that your data has been successfully imported:
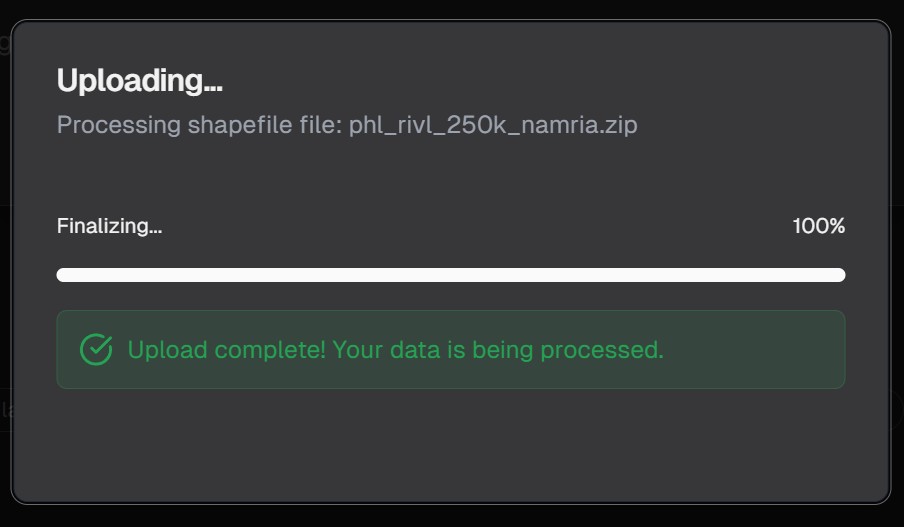
During the upload process, you'll see a progress indicator:
3. Data Processing and Import
After uploading, GeoRetina AI will process your data to make it queryable:
- The system validates the file format and structure
- The data is imported and indexed for fast querying
- Attributes and feature types are analyzed
- The data becomes available as a queryable layer
Viewing Uploaded Data
You can see all your uploaded data layers in the data layers panel:

Querying Your Uploaded Data
Once your data is uploaded, you can query it using natural language, just as you would with any other data source:
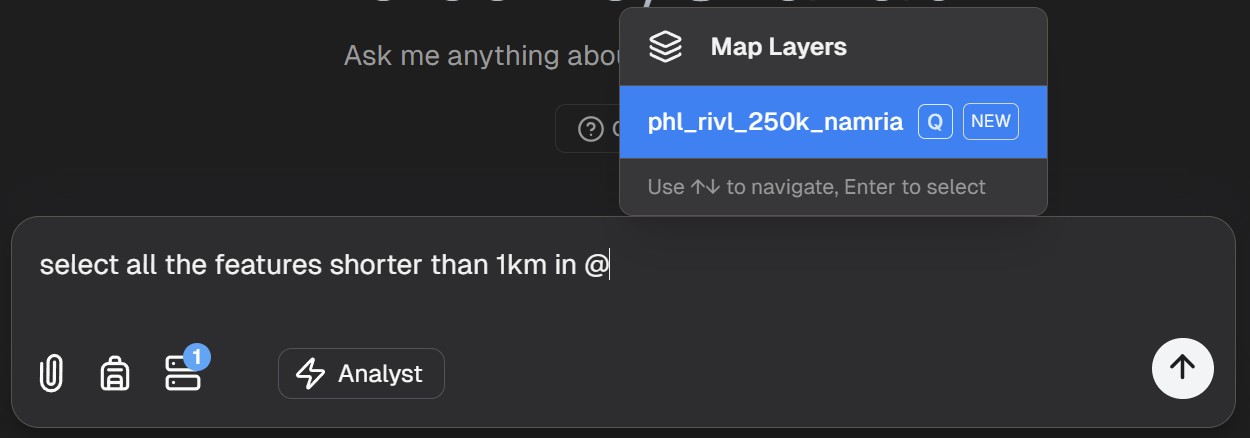
Example queries for your uploaded data:
Basic Query Examples
Show me all features in my uploaded layer
Count the number of points in my data that are within the city boundaries
What is the total area of polygons in my uploaded dataset?
Show me features in my uploaded layer where the 'status' field is 'completed'
Best Practices for Custom Data
For optimal results when working with your own data:
- Clean your data before uploading to ensure quality results
- Use descriptive attribute names to make querying more intuitive
- Keep data size reasonable - very large datasets may take longer to process
- Include relevant attributes that you might want to query
- Use appropriate coordinate systems - GeoRetina AI works best with WGS84 (EPSG:4326)
- Verify attribute types are correct (numeric fields should be numbers, not text)
Data Privacy and Security
Your uploaded data remains private and secure:
- Files are encrypted during transit and storage
- Data is only accessible to your account or organization
- You can delete uploaded data at any time
- No data is shared with third parties
Limitations
Current limitations to be aware of:
- Maximum file size: 50MB per upload
- Maximum number of features: 100,000 per dataset
- Temporal data support is limited
- Complex attribute relationships may not be fully queryable
Combining with Public Data
One of the most powerful aspects of GeoRetina AI is the ability to combine your uploaded data with public datasets:
Show me OpenStreetMap schools that are within 500m of points in my uploaded dataset
Compare the density of features in my dataset with the population density from Overture data
Find areas where my uploaded polygons overlap with protected natural areas
This capability allows you to gain insights that wouldn't be possible with either dataset alone.